How to make curtains, curtains design, curtain needs, curtain styles

Showing posts with label hanging curtains. Show all posts

Tuesday, April 7, 2015

How to Hang Combination Tape Curtains

HANGING INSTRUCTIONS - PENCIL PLEAT CURTAINS


Ironing may be required before hanging - ensure iron is used on fabric side only.


STEP 1.
Ensure that the 4 cords of the tape are securely knotted at one end of the curtain. To Pencil Pleat the curtains use the 2 outside cords of the 4 cords on the heading tape.

STEP 2.
Hold the 2 outside cords and with your other hand gently push the heading along the cords until the fabric is pleated to its maximum, this forms the pleats. Ease the heading out again to the desired width, distributing the pleats evenly.

Tie a knot to hold them in place. Cut off the excess cord immediately past the knot to avoid a possible strangulation hazard. Ensure the end of the
cord is minimum of 1600mm above the floor.

STEP 3.
You will notice that the tape has 2 levels of hook pockets. This allows you to vary the finished length of your curtains. If you wish to hang the curtains below the track, use the top row of pockets for the curtain hooks. If you require the tracks to be covered, the bottom row should be
used.

To avoid creating a possible strangulation hazard for children, the corded internal window covering must be installed in such a way that a loose cord cannot form a loop 220mm or longer at a height of less than 1600mm above the floor level.

You must ensure that once installed to your satisfaction, the cords are tied and cut off the excess cord immediately past the knot to avoid a possible strangulation hazard. Ensure the end of the cord is minimum of 1600mm above the floor.


Friday, January 11, 2013

Tips on How to Hang Your Curtains in Style with Curtain Rods


Before, they were used to simply serve their purpose -- hang curtains. Today, curtain rods are more than just a tool. They have evolved into a more functional, more sophisticated devices that do not just hang curtains but also compliment and enhance the overall effect of the drapes.
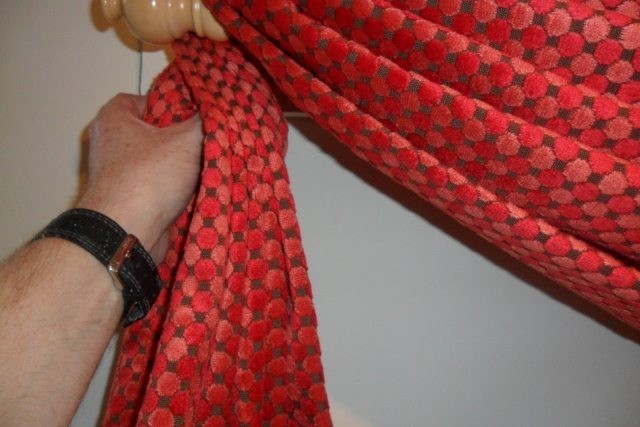
Showing more skin, curtain rods are no longer the typical metal or wooden sticks used to hang curtains. They have evolved into remarkable works of skill or talent, showing every design as an intricate sketch of masterpiece.
Wooden curtain rods are now made more sophisticated and classy. Most of them are handmade and crafted with the most top-rated materials to bring out the beauty of the wooden material.
Various designs were sculptured in the wood, with different glaze materials or varnish as the finishing touches. Hence, you can make either a Victorian or a Western-inspired window with curtain rods that were made from high-quality wooden materials.
On the other hand, the solid and powerful effect of metal curtain rods is no longer confined to the usual plain metal stick. With the growing popularity of metal curtain rods, consumers now have more choices. They can choose from a wide array of metal curtain rods such as solid brass, chrome, graphite with brass, and brushed chrome.
With a wider range of choices, more and more manufacturers tried to develop newer, fresher, and more exquisite designs to compliment, contrast, or enhance the beauty of curtains. They can even modify plain curtains by transforming them into something more elegant.
Installing curtain rods has also evolved into an innovation, bringing ease and convenience in mounting curtain rods on walls, woods, or other types of surfaces. Hence, whether you live in a castle, cabin, or the classic abode, there is certainly a good curtain rod that will suit your taste, your style, and of course, your curtains.
However, curtain rods do not just differ according to their designs or structures. They also differ in sizes and shapes. Hence, it is important to measure your windows first before you go out and buy your curtain rods.
Here are some things you must consider when buying curtain rods:
1. Your windows
Your windows have different sizes, according to your plan when you were just building your house. And even if you have bought a ready-made house, window sizes are not standard for all types of houses. Hence, it is extremely important to measure your windows first before you start buying your curtain rods.
All you have to do is to measure the outside part of your window. This is where you will mount your curtain rods. It is best to have the correct size than to waste time and money by going back to the store just because you have to wrong size.
Keep in mind that as a rule, your curtain rods should always be longer than your window by as much as 5 inches. This ensures total coverage for your windows.
2. Your curtains
Of course, you should never start buying curtain rods without looking first at the curtains that you will use. The types of curtains you will use will determine the type of curtain rod that you have to buy.
For example, if you will be using the typical designs of curtains that flow straight down the wall, you will have to buy a chrome curtain rod, for heavier drapes, you need to buy stronger metals such as graphite with brass or solid brass.
3. Strength of the curtain rod
You would not want your curtains sagged unattractively down your windows, right? Hence, to avoid such dilemma, it is best to choose curtains rods according to their strength and capacity to hold a certain type of drapes or curtains.
For heavier curtains, it is best to choose stronger, more solid curtain rods. Supporting devices should also be considered. These brackets provide end-to-end support for the rod, as well as support for the middle portion of the curtain rod.
4. Your budget
Curtain rods can be very expensive especially if they were made from high-quality materials. Hence, if you cannot afford to buy those expensive kinds, it is best to stick the ordinary.
Keep in mind that decorating your home with good sets of curtain rods can change the way people will look at it. However, it does not necessarily mean that you have to spend more than what you can afford just to decorate your house.
So the next time you buy your curtain rods, consider these factors and you will definitely make a big difference. Even if curtain rods are generally seen as something that holds up your curtains, they can also reflect the kind of personality that you have.

Monday, January 7, 2013

A Guide on How to Hang Curtains


Let's start right at the beginning:


Ladders step: Make sure there is a steady pair of steps is not too short for you more than accessible. Will your arms fall before you've taken the first lesson in how to hang curtains. Not to the hill that you can not access the window comfortably without leaning to the side to hang curtains throw you off balance.

Curtain hooks for standard pencil pleat curtain tape

Curtain hooks again before you begin, make sure that you have enough of the right kind of curtain hooks
It will be fine curtains and light with a standard plastic hooks.

Medium weight curtains use nylon hooks, stronger than plastic. Will flex without breaking.

Use heavy curtains nickel metal hooks, they are a bit clever to deal with that they all stick together box. Just like Chinese puzzles I had as a kid.

Headed curtain hooks bucram curtains

You will need the so-called "pin hooks" just to have a sharp pin pierces through the fabric and bucram on the back of the head curtain. This type of item makes for a better looking curtains. As always the best way it all costs a bit more.

An extra pair of hands

When you learn how to hang heavy curtains or large very useful to have someone standing on the ground level with a curtain weight. This allows you to hang the curtain on your path or rod with ease.

How many hooks do you need?

Curtains well shine a standard pencil tape rolled up you will need to connect each pocket 4.
Curtains bucram headed'll need 1 each pleat or mug, one for each end.

Prepare your bucram headed by hanging curtains.


The other good news of put the pin on hooks them 1/2 inch from the top of your curtain. There is no longer willing to do it. You have to learn how to hang curtains and dress them properly.

Prepping curtains rolled up your pencil before hanging:

Standard pencil pleat curtains to start you will need to collect the tape on the top of your curtains. Do so by pulling ropes 3 in the back of the curtain tape. To begin pulling ropes from both sides of the tape scenes and link them together in a knot company.

There are 2 reasons for this

1. It stops you completely pull the ropes of the tape (not a good start when learning how to hang curtains).
2. It keeps the ropes together in the end you pull the ropes to collect your curtain.
He then continued to pull the ropes. Tip simple to collect your curtains. Take one set of ropes and connecting knotted over a door handle or some other fixed object. Then use one hand to hold the tape curtain with the other hand begin to pull the tape away from the door handle. You will see the curtain on the address of the start pleat.
How wide curtains you need to be?
Choose half the width of your track or rod measures. Let's say your path is 100 inches long. You half to 50 inches, then add 2 inches to allow your curtains to meet comfortably in the middle when hanging. Consequently, the supply that you want to finish collecting all of your pair of curtains is 52 inches. The sooner you learn how to hang curtains, and more this becomes second nature.
Before hanging curtains ... Stop and check!
Before you start to hang your curtains you need to put your curtain down on a table or the floor and check presentation brings about right. Then if to narrow down and then pull the tape a little. If extensive collection then tape a little more.
What about the surplus of the cord?
Sorting in the end all that surplus cord and evening, so that the folds in the tape. Do not cut the ropes! The best solution is a bundle of ropes by wrapping them around your fingers and then connect each node slip on the package. This allows you in the future to change the tape head should want.
Once chords are sorted by converting the curtain. You need to look in the folds and even tried them out. Just do it almost at this time because when I came to hang them folds will move slightly.
Post before cutting your curtains
All most there, before you can hang your curtains have to put curtain hooks in the pockets on the back of the tape. On most standard pencil tape rolled up there 3 pockets upper, middle and lower.
How to hang curtains from a rod or pole
If hanging under a rod or pole put your curtain hooks in the upper pocket. We also note the number of rings on a rod or pole. This determines the number of hooks you put in the tape curtain. As a general rule of thumb to use less hooks on the rod or pole on the path of the curtain. On the path of development of Hawk Pocket 4 ever and ROR or pole pockets every 6 to 8.
Hanging from the track?
If hanging from a curtain track curtain hooks and then put in the middle of your pocket or bottom pocket. This allows the curtain to cover the track when closed. To decide which pocket to use to try one and see what it's like your curtain hanging. If you have a big happy then do another curtain. If you did not move Said curtain hooks up or down to suit.
Step 1 when hanging
A lot of people say you should always start your hanging curtains from the ends of the track or rod and work on his waist. I did not agree, and I say should always start from the outside East and work on the ends. Why I advise you to do it this way is that if you have
Gliders too much on your track or too many rings on a rod you can easily remove the ends of your track or rod. Where if you start from the outside in the middle of the gliders are locked surplus or rings in the middle of your path or rod. This means you have to unhang curtains to remove them. Not much more than that and now you'll have the basics on how to hang curtains.
Why some advice to start from the middle?
The reason is that in some of the tracks and bars, but mostly this kind corded. Their so-called overlap arms. This is a short arms made of metal or platic with holes in for the last few years of curtain hooks on each leading edge of your pair of curtains (edges that meet in the center of the window). Theses interfere weapons allow for a curtain to pass and overlap other curtain by 2 or 3 inches. Giving you total privacy.
So what is the big problem?
Where is the problem? The problem is that these weapons are not very strong. This means when you start to hang a way to a heavy curtain. Especially without the presence of any weight they carry sag and twist or break completely.
Avoid the problem!
So how do we avoid it when hanging from the middle of the road or rod and work abroad. Really quite simple, if you need to go 2 hooks in the arm overlap and then return to connect 3rd and link it in the first real glider or ring. Leaving the 1st and 2 curtain hooks to hang only in space. Continue to work your curtain hanging from the outside East. This is how to hang curtains on my way (the best way is clear "signal")
Then once you have arrived at the end of your path or rod (remove any surplus gliders or rings). I go back to the middle, and linked in the past two years of curtain hooks into the arms of the interferometer. So in order to avoid putting too much weight on them.
Well I hope you have picked up some "tips" on how to hang curtains. This is only the first phase. Next is the "dressing" of your curtains.

Monday, December 10, 2012

How to Protect Your Tub and Floor with Long Shower Curtains


By choosing a long shower curtain for your master bathroom, and will be an attractive addition to the room, and a way to show your aquarium and bathing. The best material for the purchase of cloth, not plastic, if you want to go "green." A nylon shower curtain dries very quickly, and you can avoid mold problems of plastic shower curtains. The tighter weave fabric curtains help to repel water more efficiently. Select long shower curtain to keep the lining of your floor from getting wet, and to provide support for a shower curtain.

If you want extra long curtain for your shower, you may take a look a little more than if you were to take a decision on the standard sizes. But between local stores and online stores, you can find the length you want. May cost more than standard sizes, though.

On the internet, you can browse through the shower curtains of different lengths, from 72 inches all the way to 120 inches long. Therefore, you can get a shower curtain in the length you need, regardless of how long the scenes you're looking for. Buy extra long shower curtain is more visually appealing, if they go with the theme that you have in your bathroom.

Extra long shower curtains are not uncommon, and they are becoming more easy to find. Newer homes boast spacious bathrooms, and longer bathroom curtains work very well with this design bathrooms.

Renewing the decor in your bathroom, shower curtain country be just what you are looking for. These come in different sizes, including a very long time, and it is very traditional in shape and form. They can make your bathroom more cozy and inviting.


Shower curtains made of fabric of the country spend most worry about mold curtain. You can use a simple color-Turabi in curtains and shower curtain rings. The country style bathroom curtains are a perfect match for your country house atmosphere. Select long lines to protect your floors from excess water. You do not even have to leave home to make your bathroom. You can surf the Internet from sources shower curtains, check out hundreds or thousands of styles and sizes for your bathroom.

Even with a wide variety of styles and sizes, the curtain, you may still come to the time when you need to request Star customized to suit your aquarium or shower exactly. Most showers have dimensions that are standard, but some are oddly shaped, or you've designed your bathtub, and, and you may need shower curtains on it with a view to show your aquarium and bathing.

Shower curtains custom usually means high quality products and elegant that will emerge from the bathroom to look the best that is available. If you can choose your fabric, you know it will complement the rest of the room. You will have literally thousands of possible combinations of color, size and style. When you select the perfect shower curtain for a long time your bathroom, and will be the perfect finishing touch.

Saturday, July 21, 2012

Suitable Accessories for Kids Room Curtains – Part 1

 Suitable Accessories for Kids Room Curtains – Part 1

Poles for Kids Room Curtains

The poles of kids’ curtains are available in different shapes, patterns, colors and materials. Choose decorative and durable curtain poles for kids’ room curtains.  Attractive curtain poles make the room look highly appreciable. Always check fitting of the pole so that the curtain may hang from the pole perfectly. Choose right track or poles to support curtains. The fitting should be durable otherwise it can be harmful to your kids.


Kids Room Curtains Rods

Curtains rods are not only the tools to hang curtains but they enhance complete look of your kids’ room décor also. Wooden curtain rods give a cozy look to the room. Since kids like trendy and stylish things in their room so you can choose from a wide variety of metal curtain rods such as solid brass, chrome and brushed chrome etc. You can use some funky ideas for rods of kids’ curtains such as a tree branch, old fishing pole etc.


Kids Room Curtains Hooks and Rings

Curtain hooks and rings for kids’ room come in different styles. To make kids’ room appealing, you can choose from a wide range of stylish hooks and rings.


Tuesday, May 22, 2012

How to Give a Fantastic Look to Your Curtains


How to Give a Fantastic Look to Your Curtains


There is no doubt that there are many purposes of curtains in home away from making the room appear grand. You can find curtains in loads of different styles, types, and colors that offer you more of an option to select from.
I think that to take care of your house is something that most people love to do. There are a lot of accessories and different things that you can add to any room in order to give it an extra appearance and to help make it look better as well. Curtains are essential for any room and they can have a few different purposes in anyone's house. They come in so many different colours, patterns and styles that they will suit anyone's colour scheme and tastes.
Venetian blinds are now available in a range of vintage-inspired muted colors or even in bright plain colors. With suspiciously placed color accents, you can avoid making the room too uncongenial.
There is an Available Variety of Curtain Hangings:
Curtains offer a completely different style. The design and is usually made in such a way that it is completely covered by the curtain whether open or drawn shut. Track curtains are ideal for layered curtains and have the benefit of being controlled by a draw cord. People often use track curtains for a more formal look. Track Curtains also have a Bay option to keep curtains flowing between adjacent windows. One thing to keep in mind about track curtains is that it takes a little bit more work to take them down and put them back up. So, if you plan on having them cleaned, you need to keep in mind that you'll want to research how to remove them from their hooks and where the hooks are positioned for reassembly.
Curtains are also used for light control to prevent fierce look, for sleeping during the day, or watching TV etc. Thick curtains are suited for light control. For partial light control sheer or net type curtains are better suited.
Curtains are also used for increasing the aesthetic appeal of a room. An elegant curtain greatly increases the aesthetics of a room and gives an opulent look. On the contrary dirty or ill matched curtains give a room a gloomy look. When the window looks onto a street it is better to give thought to the underside of the curtain as the curtain can be seen from outside and will dictate the appearance of the house.
This means that if your room is a dark space due to lack of sunlight, it is advisable to use bright color curtain fabric to add life to the room. If you have a room with plenty of sunlight, choose a curtain fabric that can offer strong resistance to fading over time. For rooms with plenty of light, blocking out the light and protecting your indoor furniture and carpets from the long Term damage sunlight can do.

According to the space you want to decorate with a window curtain, color is a vital factor, color can relay a mood for that particular room, for example, if you have a room where you like to read, relax and have some quiet time, choose a curtain color which will aid your relaxation - don't go with bright colors. For children's rooms and rooms where the objective is to have fun, choose a bright color that will add to the fun environment. The color and the design of the curtain fabric are important factors to take into account. There are many different designs available, some fun, some serious, some serene.
Consequently, previous to making your selection think about the end product and how you want to make the room feel. Curtains made with panels that are shirred on rods or poles at both the top and the bottom of the window are another choice. This style of curtain is not usually opened and closed so if you are looking for a stationary treatment that provides privacy, this is something to consider. Look at curtain styles with tiers, embroidery, swags or scalloped edges. You may want French country toile, gingham or lace. Changing curtains to suit the season or your mood is an option since curtain panels are some of the more inexpensive habits to update home decoration.

Sunday, May 20, 2012

The Fifth Great Way to Hang Your Scarf Swag Curtains


The Fifth Great Way to Hang Your Scarf Swag Curtains


This scarf swag idea is just really an adaptation of the second scarf swag type. It uses two scarf swags wrapped together to give you a more interesting look.

You start by following the same instructions as the second way.

Anyway you leave little more of the curtain rod uncovered between each swag wrap. This allows you to then wrap the second scarf swag in exactly the same way. I made the second swag shorter so it only reaches the ends of the rod on both side and does not hang down at the sides.

You can make both scarf swags the same size if you prefer. It is all a matter of personal preference. I hope you like these scarf swag ideas and will have a go at creating at least one for yourself.  They are a really great way to getting started in dressing your windows.


Saturday, May 19, 2012

The Best Way to Make your Own Curtain Rails


The Best Way to Make your Own Curtain Rails


You may find that the design of these curtain rails complimented the theme of our holiday home of a modern cottage. You can find a variety you might like to consider. The hooks could be painted black. The ends of the rails could have a fancy knob attached. At least one end has to be removable so the curtains can be treaded on and off again when required. If you wished you could use a square rail and bevel the edges to make it six sided instead of the round dowel I’ve used.

The benefit of having a wooden back board is that it can be screwed on to the wall where ever the studs (house frames) are. This can be a problem without the back board at the side of the window where the building framing disappears and you are left with only plaster board to screw into. 

1. Measure the window width and add 470 mm / 18½ in. That allows for 200 mm / 7⅞ in each side of the window to pull the curtains back and 35 mm / 1⅜ in. in from each end, to where the hook is placed. 

2. Once you know the length select the 28 mm / 1⅛ in. dowel first, then select the hooks that best fits the dowel. Do not trim the dowel to it final length until the hooks are in place so you can get an accurate measurement. Each end allow for a curtain ring to go between the disc and the hook. 


3. The timber back board I used was 65 mm /2½ in x 20 mm / ¾ in. 

4. There can only be two (on a narrow window) or three hooks.  The end hooks are placed 35 mm / 1⅜ in from the end. With three hooks the middle one must be centered. 


5. Pre drill the back board with a fairly large drill (you do not want to split the board) and screw the hooks into position. The ones I use I screwed up to the end of the thread. Then, using a hack saw, cut off the thread that is protruding through the back. 


6. If you are using wooden discs cut these and screw to each end of the dowel. 


7. Finish the wood to your requirement. I put a clear semi gloss finish on mine.  

Friday, May 18, 2012

The Fourth Great Way to Hang Your Scarf Swag Curtains


The Fourth Great Way to Hang Your Scarf Swag Curtains


This style of scarf swag is hung using curtain hold back arms. This is just another way of creating a new look. It is also a very low cost way to dress a window.

This scarf swag also has a simple wrap over knot on each side to add a little more interest.

I have put a picture just below of the kind of curtain hardware you need to get this look.

For your swag you will need to measure between the hold back arms. Then measure down each side as far as you want the scarf to hang.


Then add these together and add another 6 inches for each wrap over knot. Not forgetting to add another couple of inches for hems.

You will need to install the curtain hold back arms at roughly a 45 degree angle as in the picture on the right.


You will need to hem all four sides of your scarf swag. You can sew this with a sewing machine or by hand with a needle and thread or even use hemming tape and a hot steam iron for a no sew finish.


Then you need to pleat the swag as above to create five pleats running the whole length of your scarf. An extra pair of hands is always useful for doing this.

Next hang your pleated scarf swag over the first curtain hold back arm. Letting it hang down the side as far as you want it to.


Then hang the other end over the other hold back arm so you get  the same look as the picture here.


Next to get the swag hanging in a nice shape. You will need to tease the pleats in to shape.


Simply pull the pleats a little at the sides starting with the top pleat and working down.

This will make the upper pleats rise upwards. Then you may need to tease the lower pleats down just a little as they may have moved up a little with the upper ones. This will give you the nice swag shape you see above.

To finish all you need to do is to wrap each side of your scarf around the hold back arm to create the wrap knot.


There you have it another scarf swag creation. Very simple but effective.

Sunday, May 13, 2012

The Second Great Way to Hang Your Scarf Swag Curtains


The Second Great Way to Hang Your Scarf Swag Curtains

To start you will need to work out how much fabric you need to create your scarf swag. For this style of wrap scarf you will need to allow double the width of your curtain rod. Plus the length you want for the sides to hang down.


 Don't forget to add a couple of extra inches for hem allowance. I use the full width of the fabric as the width of my scarf swag.

When it comes to how long to how long have the sides of the swag to hang. This could be to the window sill or the floor if you prefer. No right or wrong just your personal preference.

The next step to do is to hem all for sides of the fabric in this example because this fabric is very thin and slippery. I used hemming tape to hold the hems in place. This is the kind of stuff you use for hemming skirts and trousers. You just need to use a hot steam iron to fix in place.


The next step is to pleat your swag in to five pleats back and forth.  Then feed the pleats in to shape all the way down your scarf.

It often pays to have someone help you with this. One starting at each end and pulling the fabric to force the pleats in to place.

Now you need to start hanging your scarf by hanging one side over the curtain rod. Letting it hang as far down as you want.


 Then wrapping the fabric holding the pleats in place as you go.

Continue to wrap the pleated fabric until you reach other end of the curtain rod.


The wider the rod the more times you will have to wrap the fabric around the rod.


 When you reach the other end of the curtain rod, you hang the remaining pleated fabric over the rod on the outside of the curtain bracket.


When you have the pleated scarf swag wrapped around your curtain rod as in the picture here, you are ready for the final dressing.


 Start at one end of the curtain rod and begin by spreading out the pleats in the fabric at the top of each wrap moving across the rod to the other end.


 Then start spreading out the pleats at the bottom of each swag. Again moving 
from one swag to the next across the curtain rod.


 Now your scarf swag should start to look something like mine in the picture  here.

Next comes the final tweaking of the swags to get them looking just as you want them, the right fullness and depth. You should end up with a scarf swag.


You should end up with a scarf swag that looks something like the one just
above.

Friday, May 11, 2012

The First Great Way to Hang Your Scarf Swag Curtains


The First Great Way to Hang Your Scarf Swag Curtains


This is probably the simplest way to hang scarf swag. Draping your scarf over a simple wooden curtain rod.

All this requires other than a rod fitted over your window. Is a piece of fabric the length you need to fit as you want it to.


I use the width of the fabric as the scarf width. This is usually 54 inches wide. A little more or less is fine.

Then I measure the width of the curtain rod. Then down the sides as far down as you want the swag to hang on each side. Then add these sizes together to get the total length of the scarf.

Don't forget to add a couple of inches for hems on to the length.

The next step is to hem your scarf swag down all four sides. I have machine sewn this piece of fabric. Then hand tacked the corners down.  As they were too thick to sew on my sewing machine.

You could just as easily but slower have hand sewn the Hems. Another option would be to use hemming tape and an hot steam iron. This would work for most fabrics to hold your hems in place.

The next step is to pleat your hemmed piece of fabric. This will give the swag its shape when hanging.

In the picture to the right here you can see how the fabric is pleated back and forth. You should end up with five pleats usually.


While holding with one hand use the other to train the pleats down the fabric. It is usually easier with two people one holding each end of the swag. Then you can both pleat from each end.

Once your swag is pleated hang one end over the end of the curtain rod. As in the picture to the right.  Then hook the other end of the swag over the other end of your curtain rod. The picture below shows the swag hung over the rod at both sides. Ready for being dressed into its final finished shape.

So far very simple and nothing very complicated. It continues that way in the dressing of your scarf swag. This section is more about just teasing the swag into the shape that you want.

To start the final dressing of your scarf swag. You need to hold the top peat on the scarf and pull it gently outwards. So the fabric mover down the sides.


When you do this to both sides you will see the swag fabric rise up in the middle.

Next repeat this process for each pleat in the fabric below. When you get to the bottom pleat, you will probably see it does not hang down low enough to give you the nice swag shape.

This is because pulling up the other pleats above has caused the bottom pleats to rise as well. So use one hand to hold the upper pleats in place.

Use your other hand to pull done on the last couple of pleats. This will make the swag curve deeper.

This will give you nice evenly spaced pleats in your swag. Just like in the picture just below.

Repeat this process for both sides of your swag. Until you have it looking exactly as you want.


Some fabrics just seem to fall right almost straight away. Other fabrics seem to take forever to look just right.

Like everything else in life, practice make perfect.

Finally the only thing left to do is to sort out the “tails”. The sides of our swag that hang down each side of the window.

I do this by getting hold of all the pleats at the top just under the curtain rod. Then twist them a little to get the pleats facing more to the front. Again repeat this for both sides.

There you have it a finished scarf swag hung over a regular wood curtain rod.


With lighter fabrics you may find they slip on the rod and pull the swag out of shape. To cure this problem you will need to fix the scarf swag in place.

I use either staples or thumb tacks pushed through the fabric and into the wooden curtain rod. This fixes the scarf swag to the curtain rod so it can't move. You won't usually see the fixings as they are right on top of the rod.

Popular Posts

Powered by Blogger.